Answers to frequently asked technical questions:
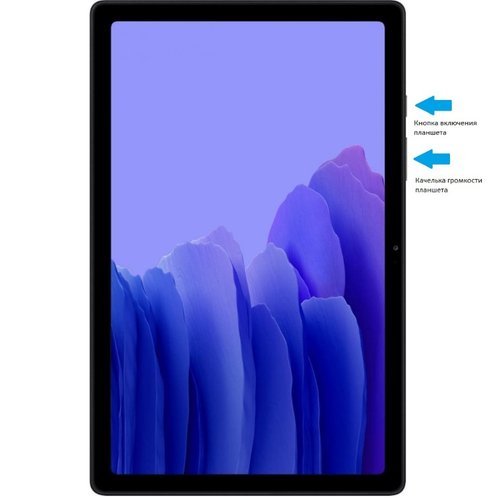
In order to turn the tablet on or off, press and hold the power button for 5-10 seconds.
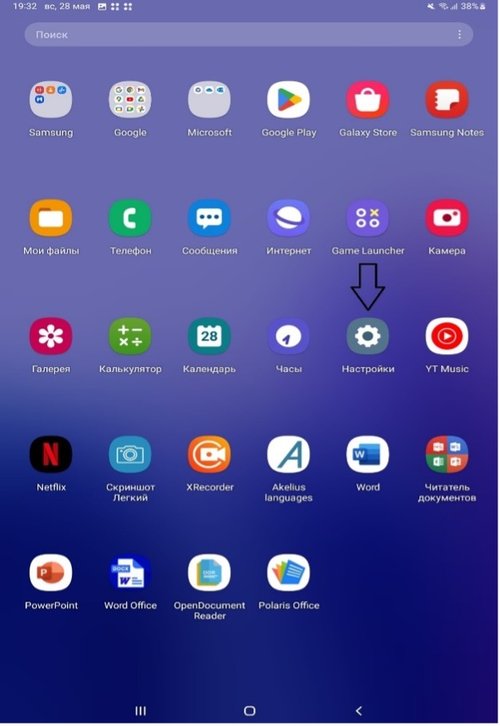
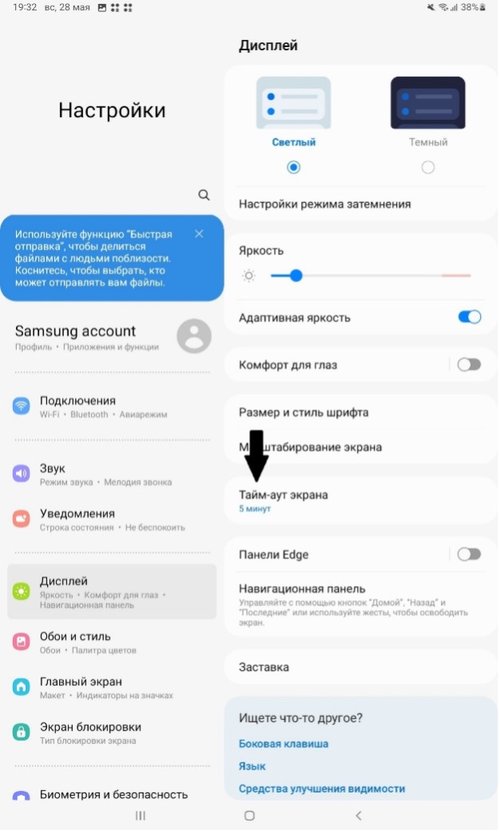
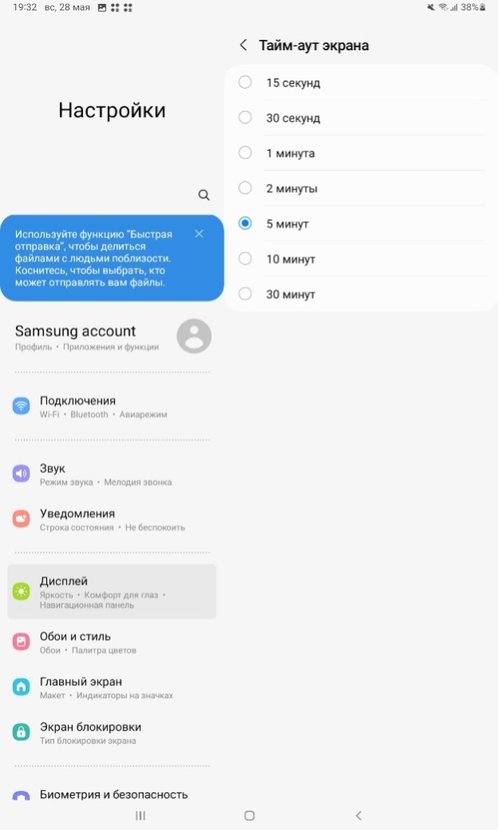
Go to the settings in the tablet menu, then you need to select the display and "Screen Timeout", set the screen timeout that you need. It is recommended to select 5 minutes.
Yes, the app can be downloaded on absolutely any Android device.
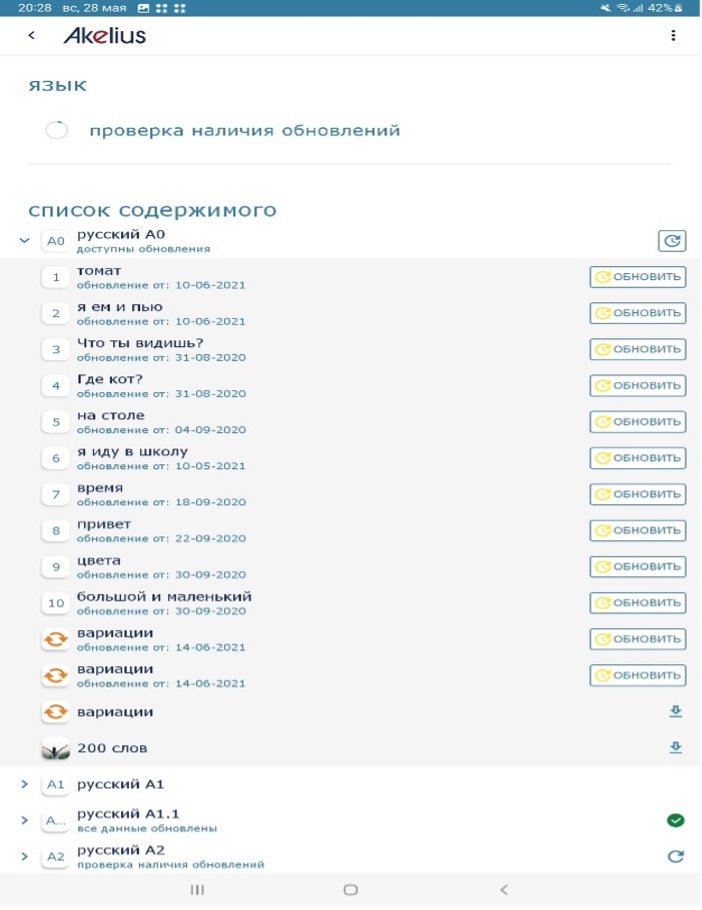
If for some reason the data (materials for the tablet) does not download, you need to check the internet connection, check the version of the Akelius Languages app on Google Play, try deleting the old data and download again, reboot the tablet and try to download again.
The mobile application gives the ability to download the necessary materials for offline work and there are functions for creating local groups and accounts for students, MeshNet technology. All these functions work through a QR code.

You will need to update the app on Google Play. The app needs to be updated on Google Play and checked every month. To do this, you need to go to Google Play.
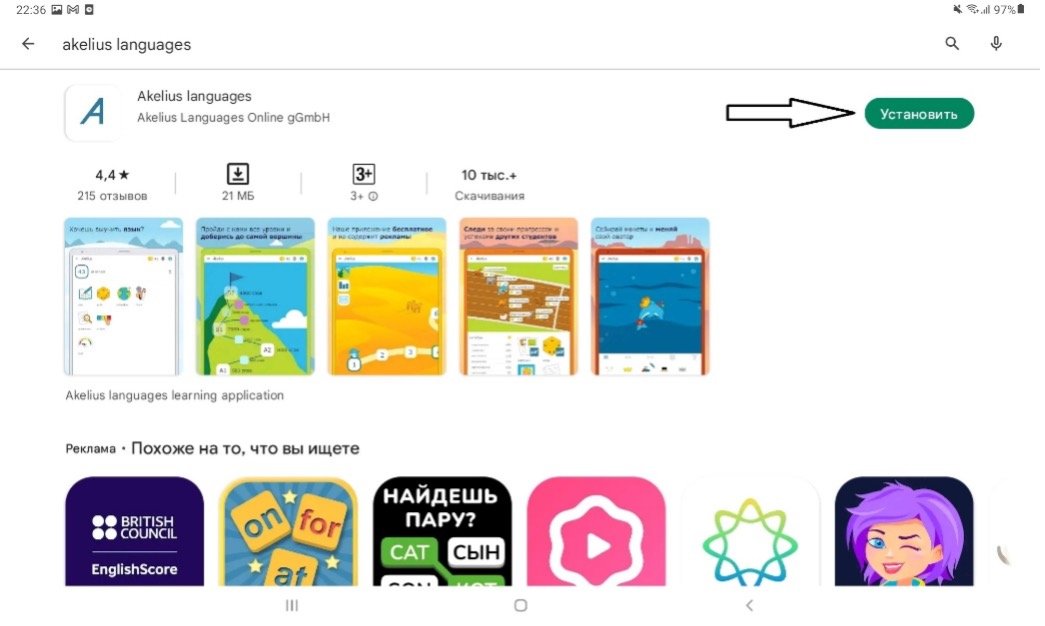
Type in the search "Akelius languages", then if the application requires an update, then there will be an "update" button instead of "install" as in the bottom screen.
Log in to the Google Play Store app, enter ‘Akelius Languages’ in the search bar, click on the Download icon.

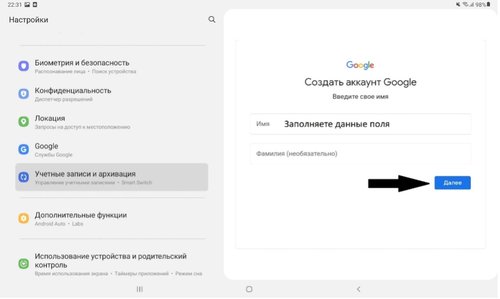
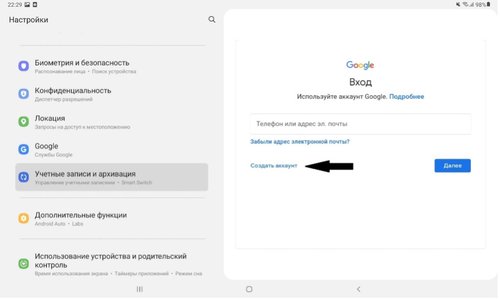
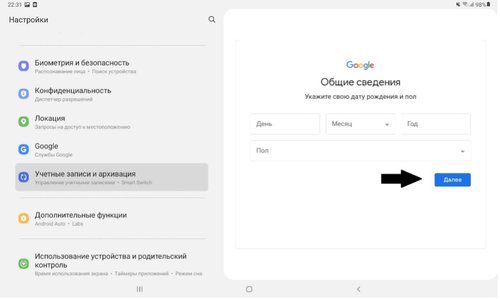
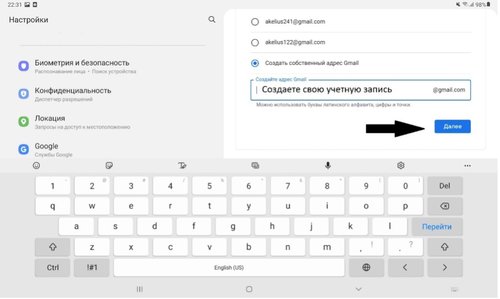
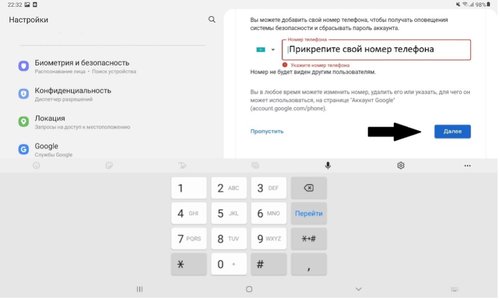
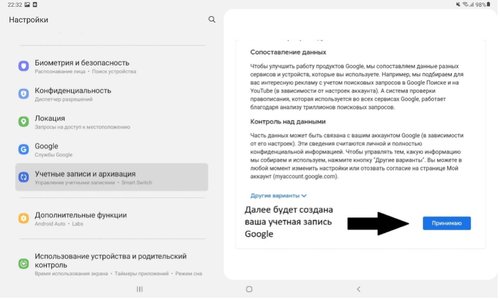
To sign in to the Google Play Store, you need to sign up for a Google account. To create a Google account, click on the sign up icon on the Google search engine homepage and follow the instructions.

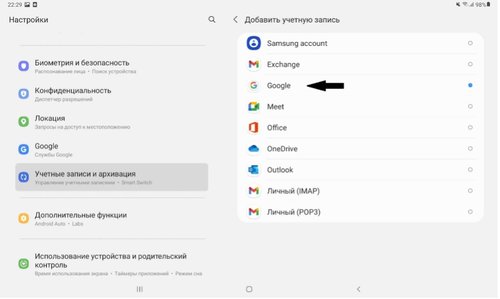
Yes, you can. You can use any other account from Google. It is recommended for teachers to use different accounts for teacher tablets and student tablets, as google accounts store all saved passwords and other information.
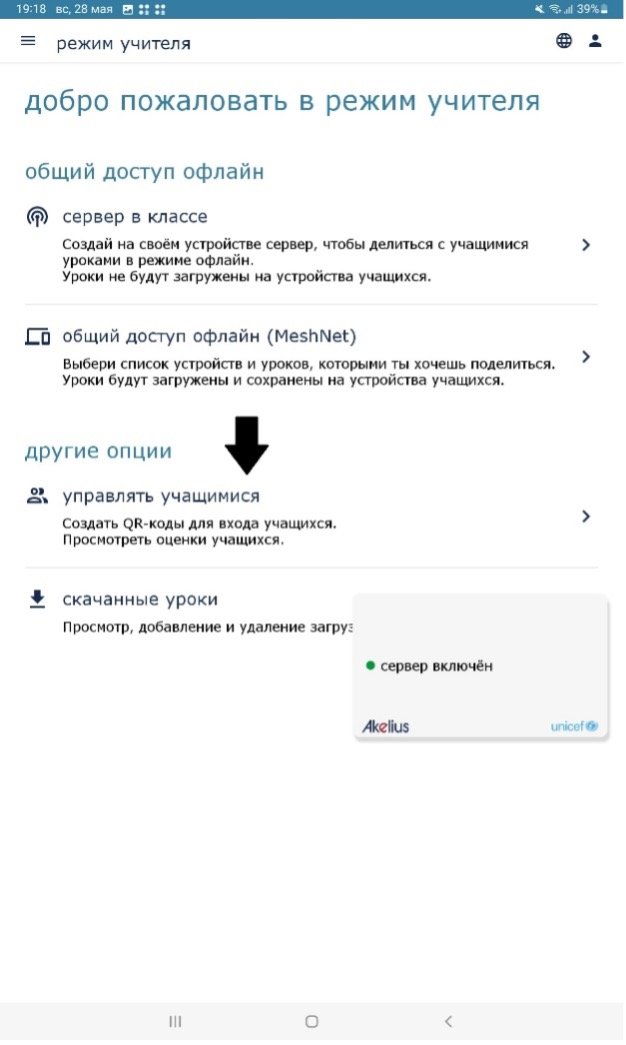
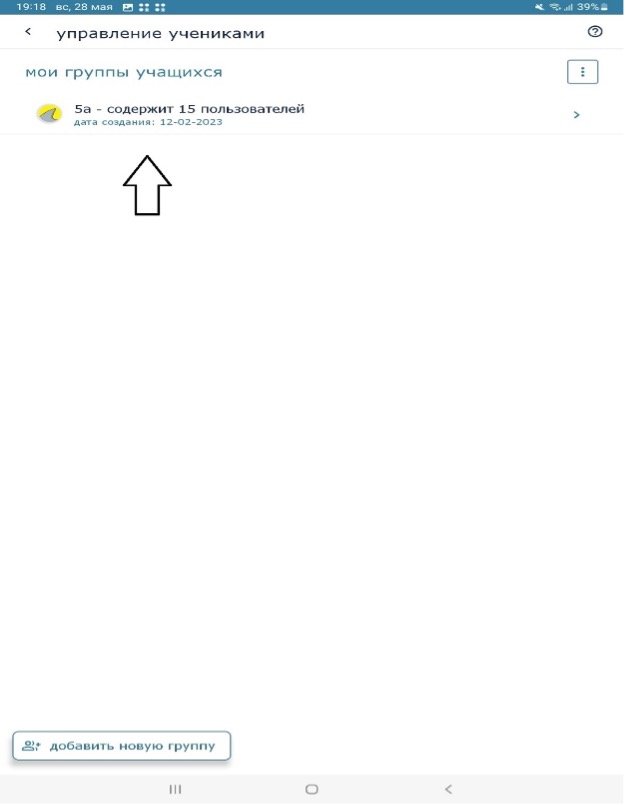
To access a teacher account, you need to request an account from an IT expert. In a teacher account, you can create a group, manage students and their grades, connect MeshNet technology to work offline without access to the Internet.
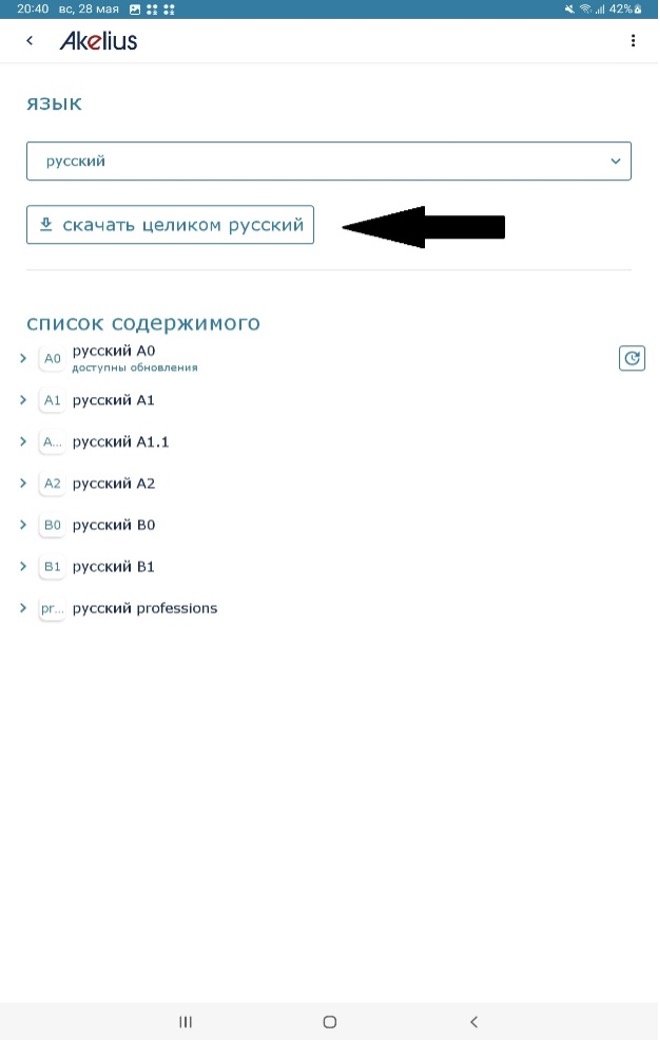
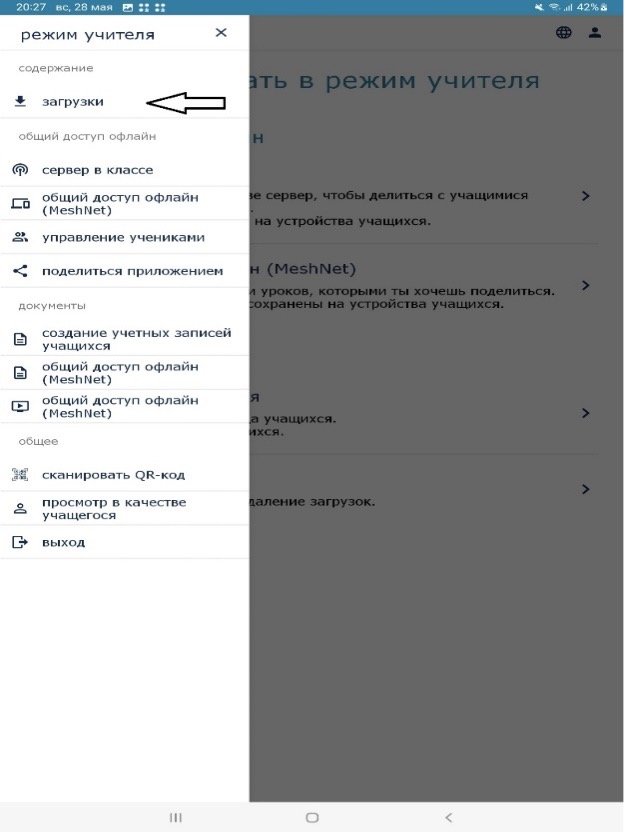
To download data to the tablet, you need to go to downloads in the teacher mode using the button and go to "downloads"

Then you can download the data individually by clicking on the icon

Or you can download everything at once
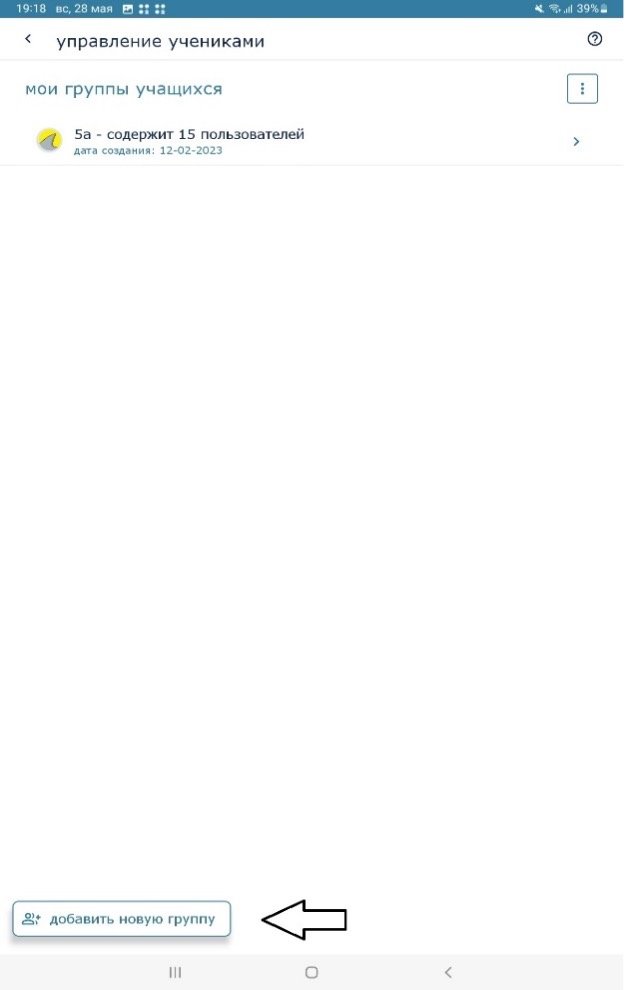
To do this, you need to go into teacher mode and then select
Then click on "add to group"
Enter the required number of students in the group and give a name for this group. It is possible to choose the color of the group and the icon so that you can quickly distinguish them from each other. (When creating multiple groups)
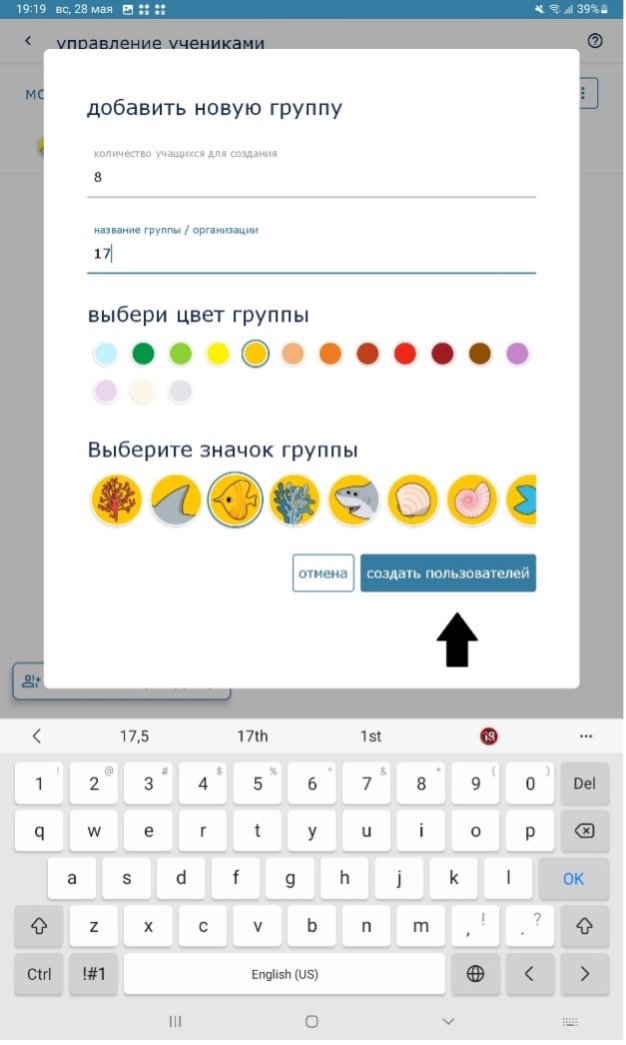
Next will be the process of creating a group and you need to wait a while.
After creating a group, a new PDF file will open for you, which will display each student's authorization QR codes and a random name (a set of random letters). With these QR codes, students can log in through their tablets. It is recommended to print a PDF file and mark each QR code for each student.
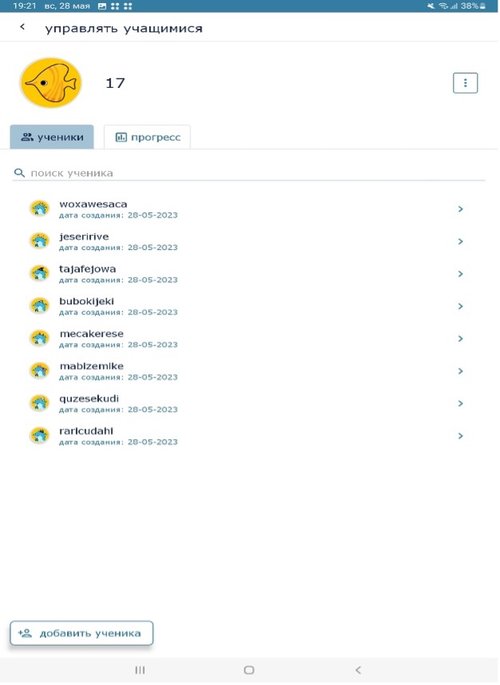
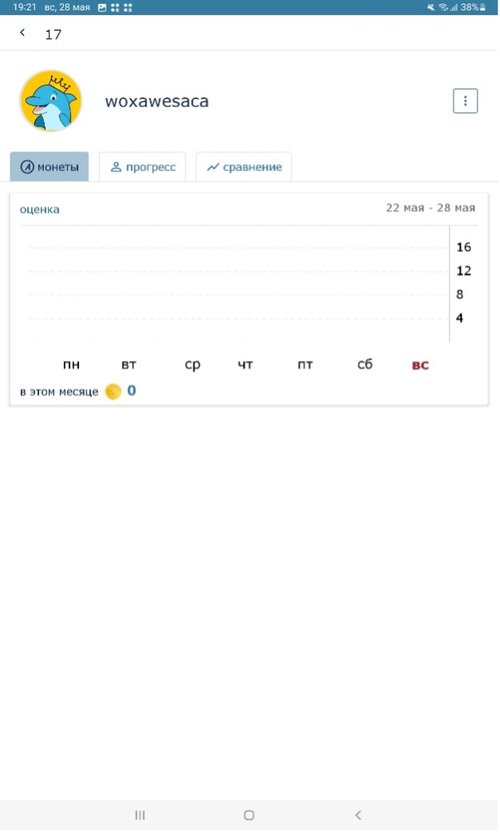
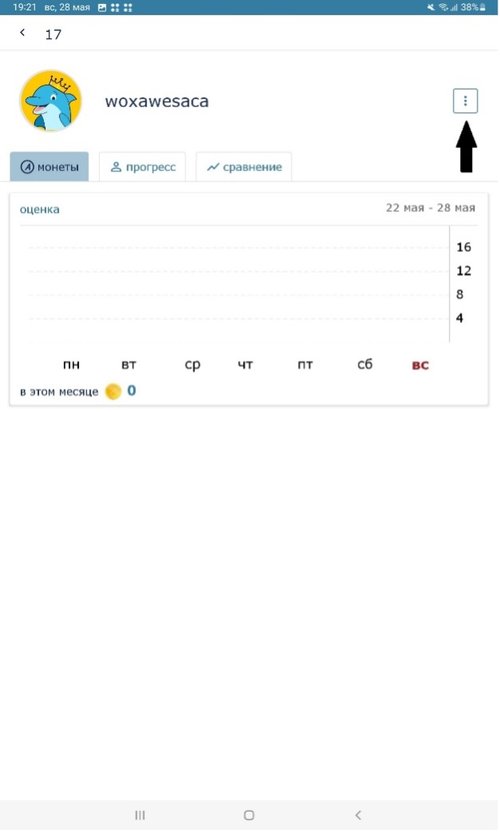
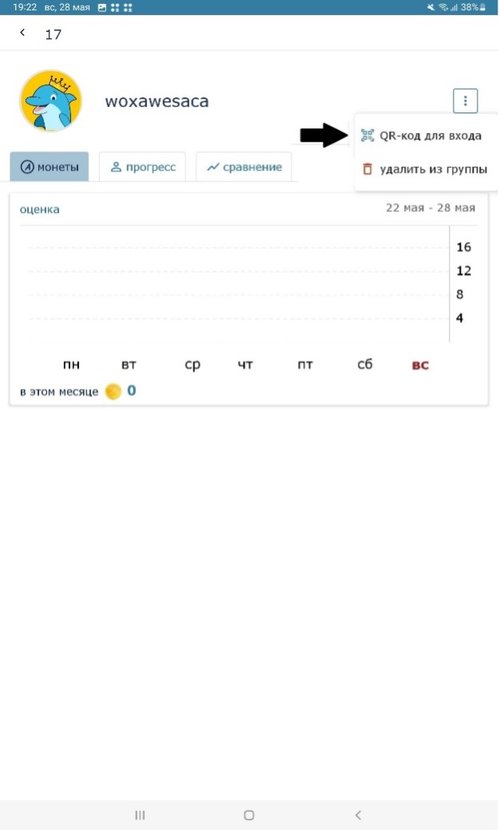
Go to teacher mode, open the context menu, find the "manage students" icon. Select the group and then the student whose grades you would like to see.
Select the student whose grade you want to view.
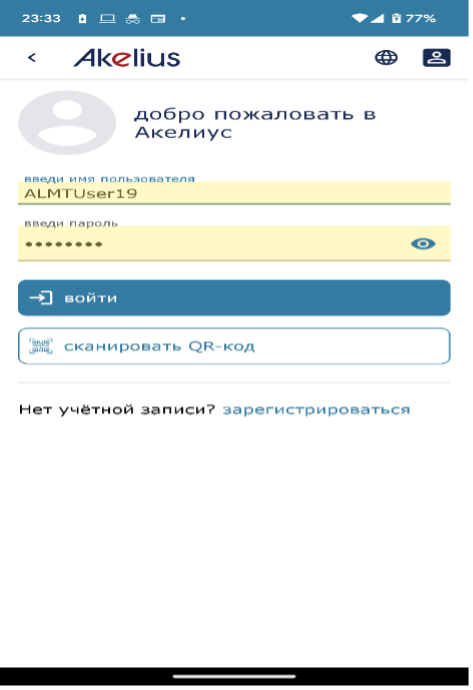
MeshNet technology is a technology in which you have a server (a tablet where all the necessary lesson data will be downloaded and authorized through a teacher account) and several clients (student tablets). Meshnet allows one tablet (server) to distribute data to other tablets (clients) via Wi-Fi. In order to use the MeshNet technology, you will need to log in through your teacher account (In this example: ALMTUser19).
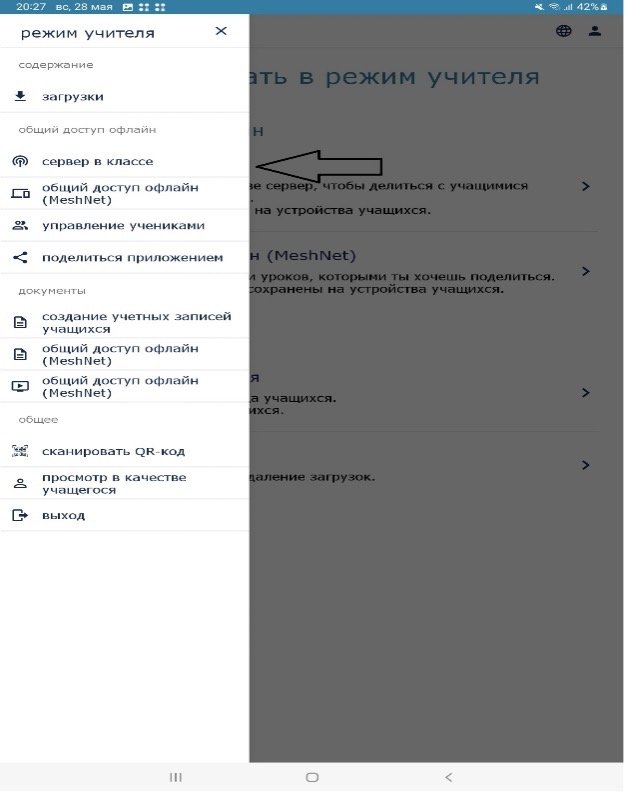
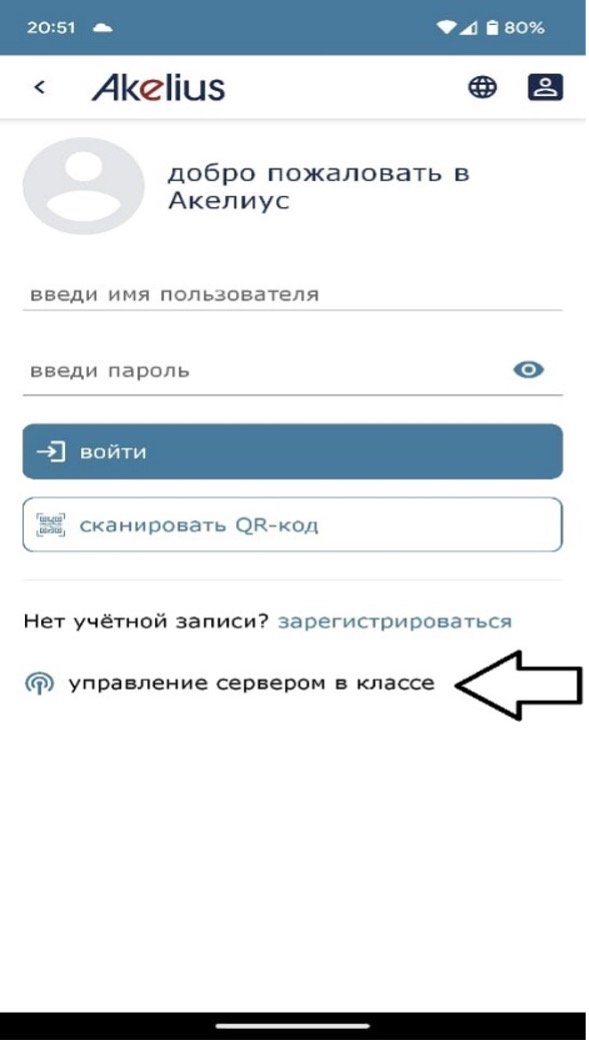
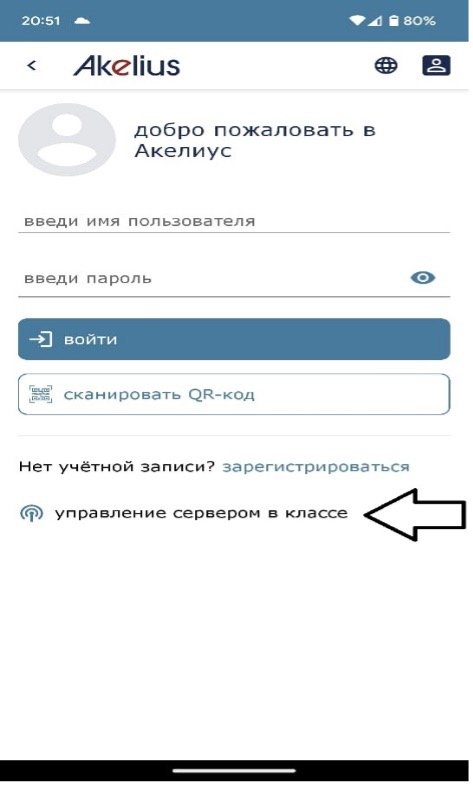
Next, you need to log into teacher mode and select the "server in the classroom" for the teacher tablet.
To start the server, you need to click on the "start server" icon.
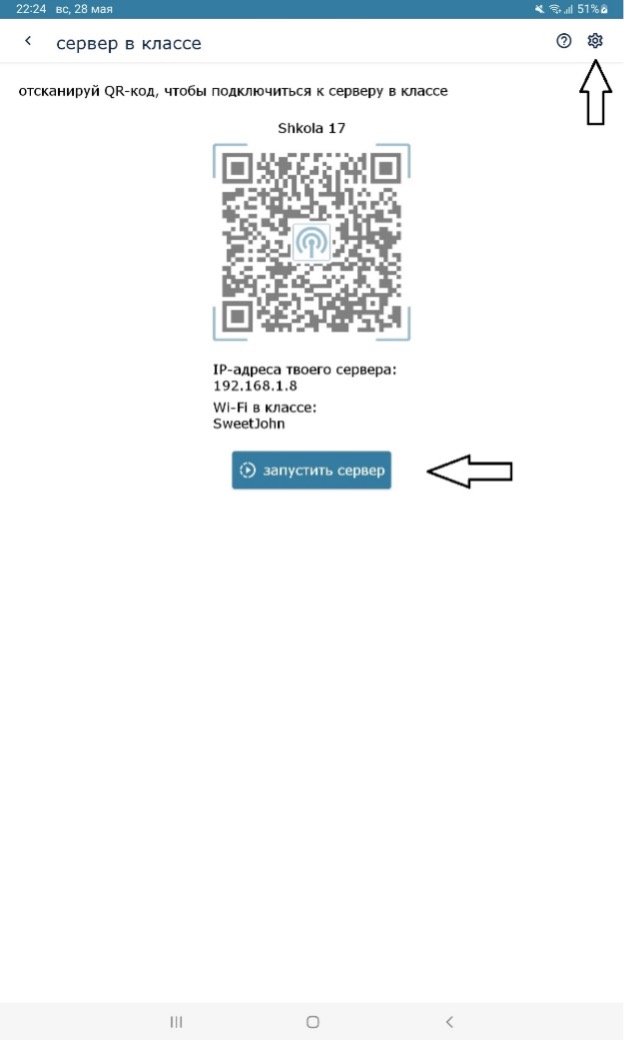
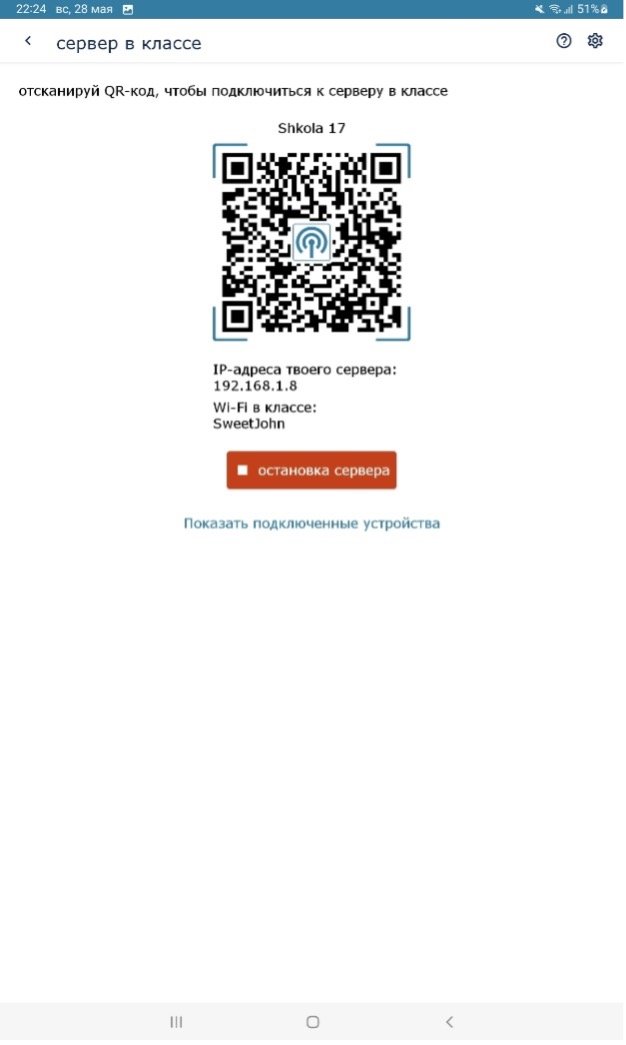
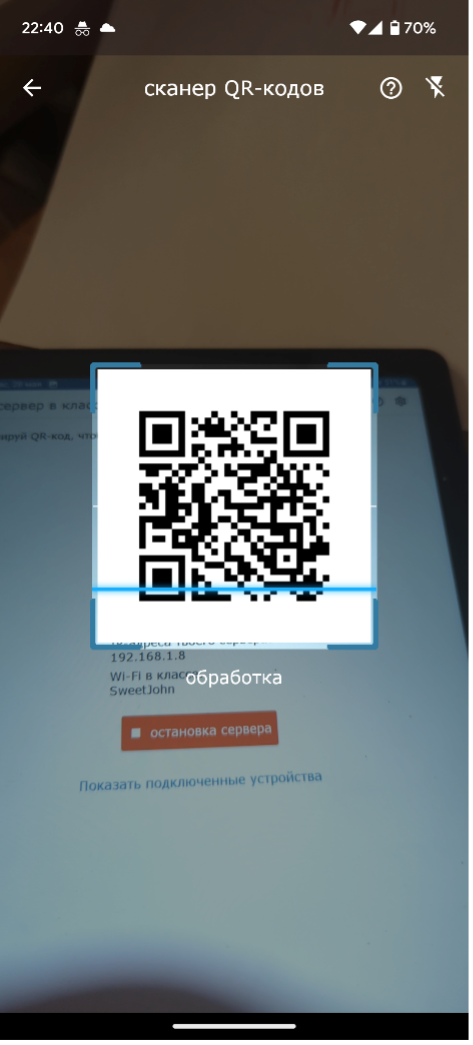
After starting the server (teacher's tablet), it is necessary that clients (students' tablets) connect, provided that all tablets are connected to the same access point (Wi-Fi). For example, in the above picture it says "Wi-Fi in class: "SweetJohn". This means that the server is connected to a Wi-Fi called "SweetJohn". Based on this, we must also connect clients to "SweetJohn" (You will have it under a different name). With student tablets, you need to scan the QR code of the teacher's tablet server. In order to bind a client (student tablets), you need to go to
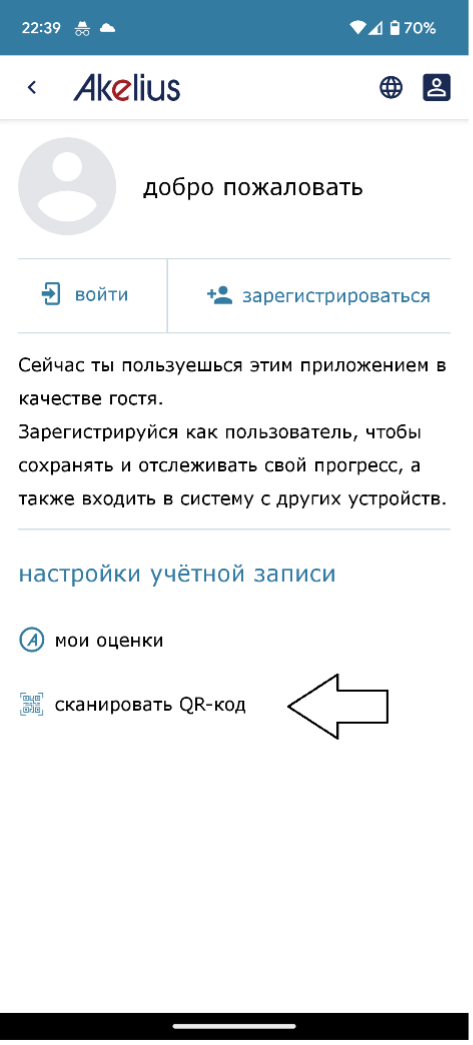
Next, you need to click on "Scan QR code"
Server QR code scanning starts (teacher's tablet)
Then comes the binding
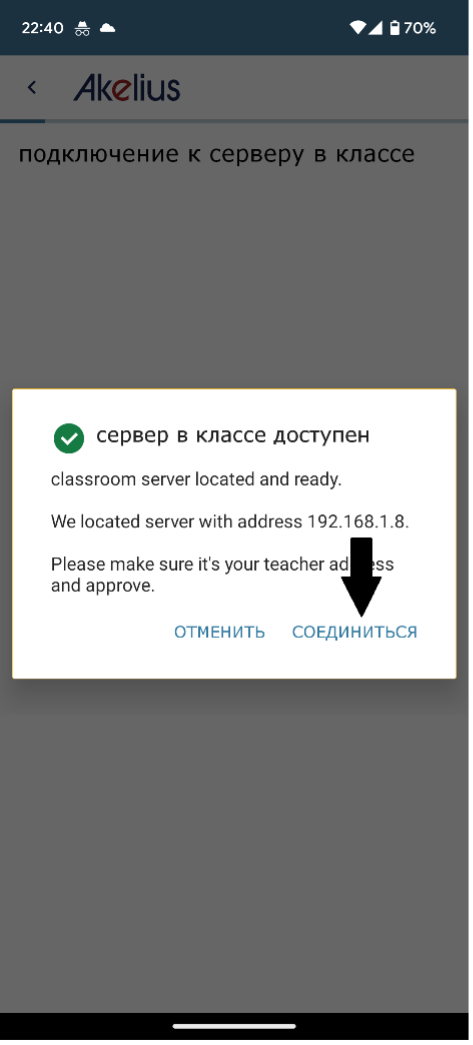
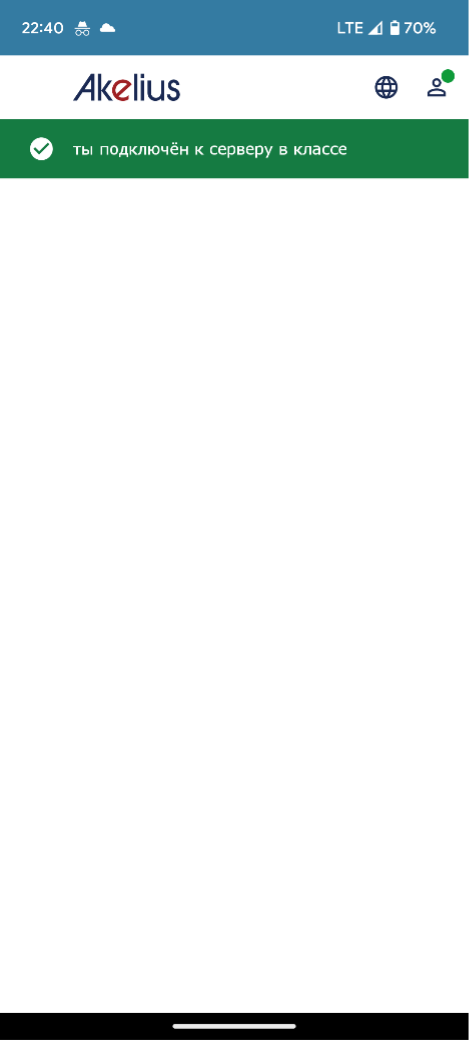
After that you will be connected to the server.
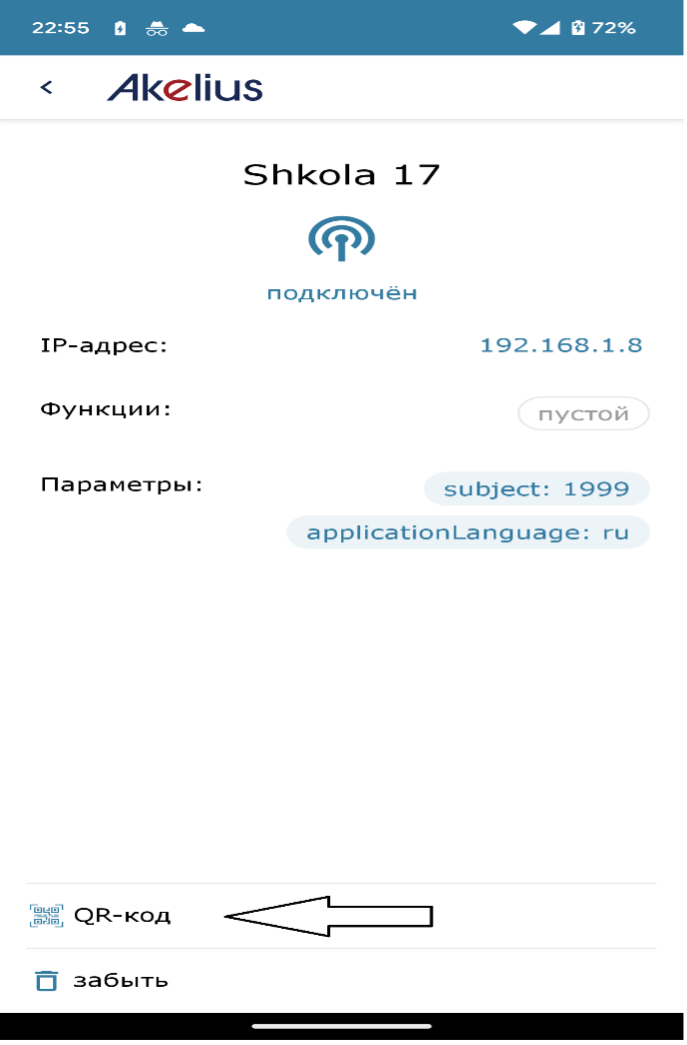
This is the main tablet with a teacher account and downloaded data. This tablet is needed in order to distribute downloaded data to student tablets, create a group for students and synchronize data (grades).
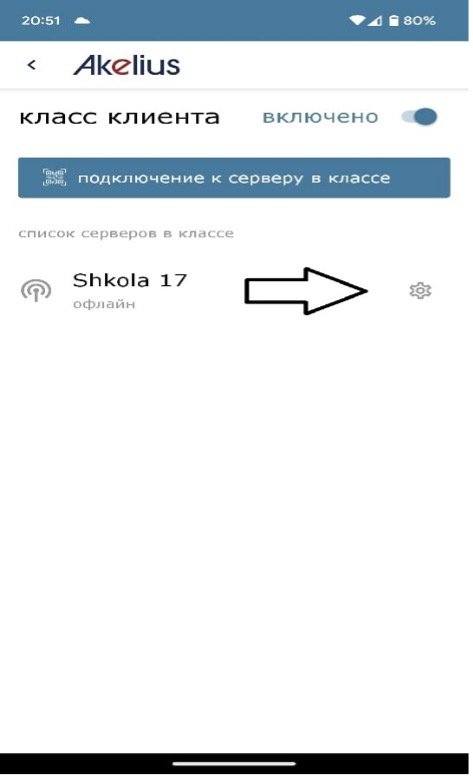
If necessary, it is possible to edit the server settings, you need to click on the icon at the top right corner.
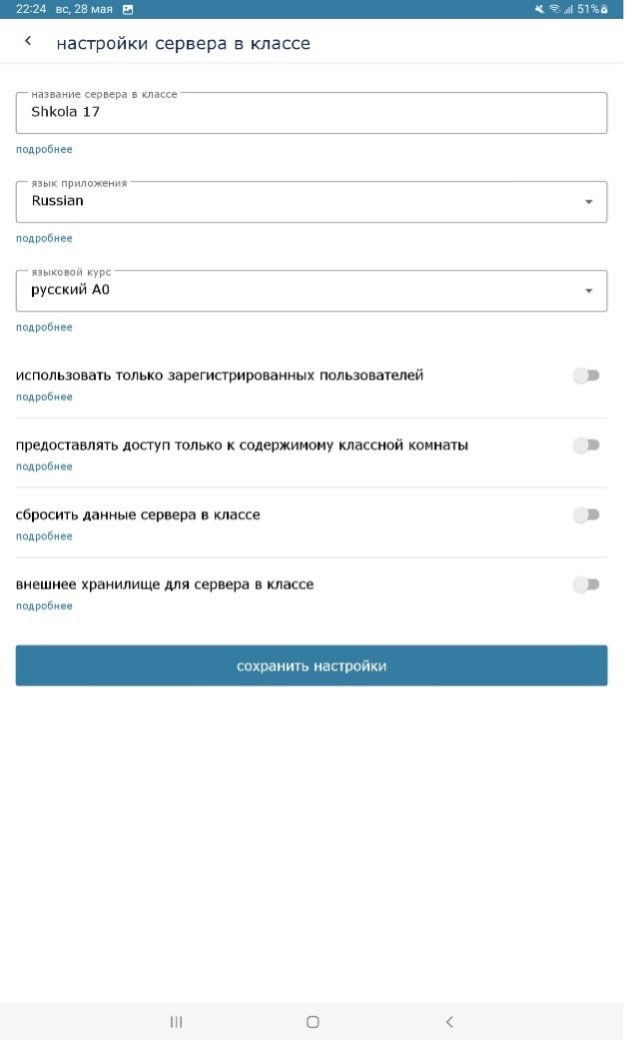
On this screen you can see that it is possible to change the name of the server, the application language and the language course. You can familiarize yourself with the rest of the settings by clicking on the "details" button.
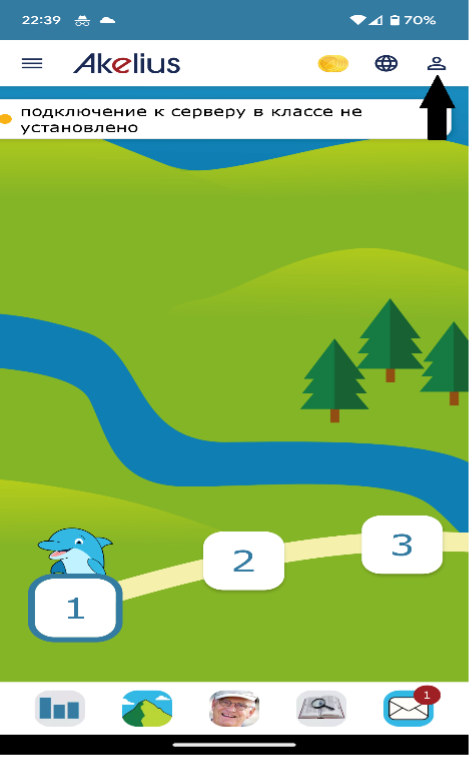
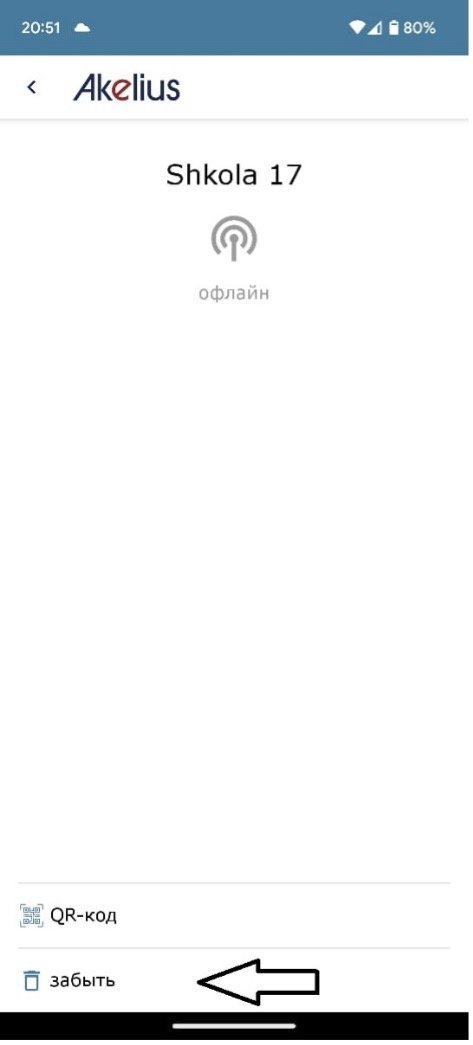
In MeshNet technology, it is possible to connect an already bound client tablet (student tablet) via a QR code. To do this, you need to go to "server management in the classroom" in the client (student's tablet).
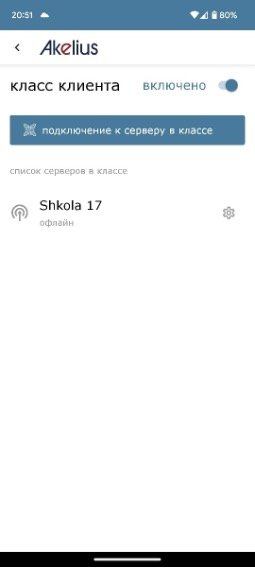
You need to select the server to which you want to connect (In our case, this is Shkola 17, you may have a different name)

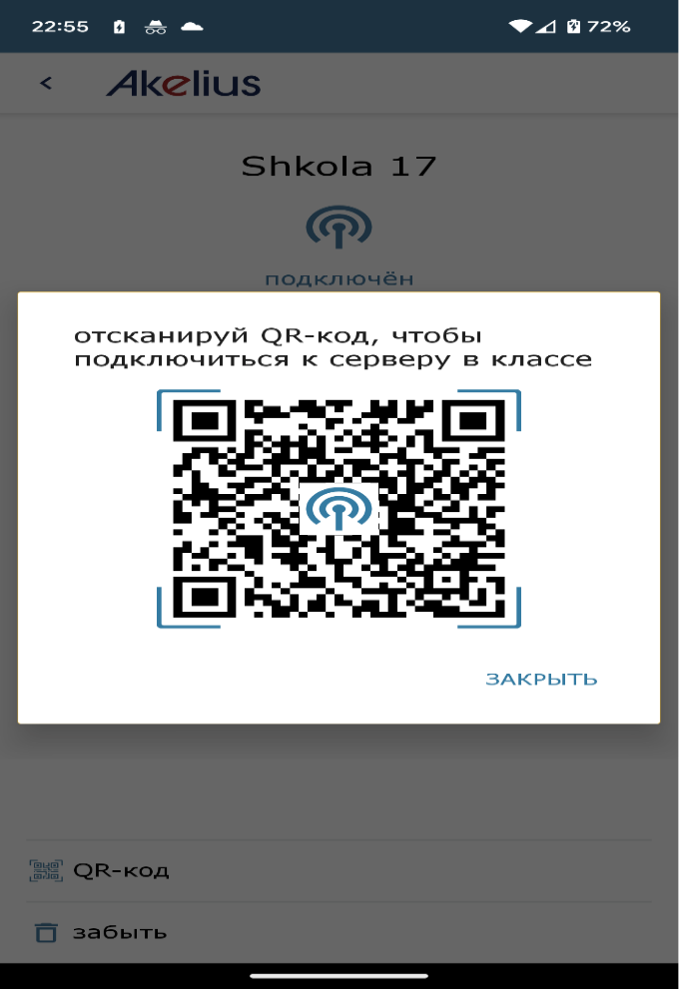
Next, you need to click on the "QR code" icon.
We scan the displayed QR code of the client (student's tablet) through another client (student's tablet). Thus, students can connect to the server without going to the server tablet (teacher's tablet).
After the client connects to the server, the client binds to the server. There may be situations where you need to unbind the client from the server in order to connect to another server or do it without binding. For this it is necessary to do the following:
Choose

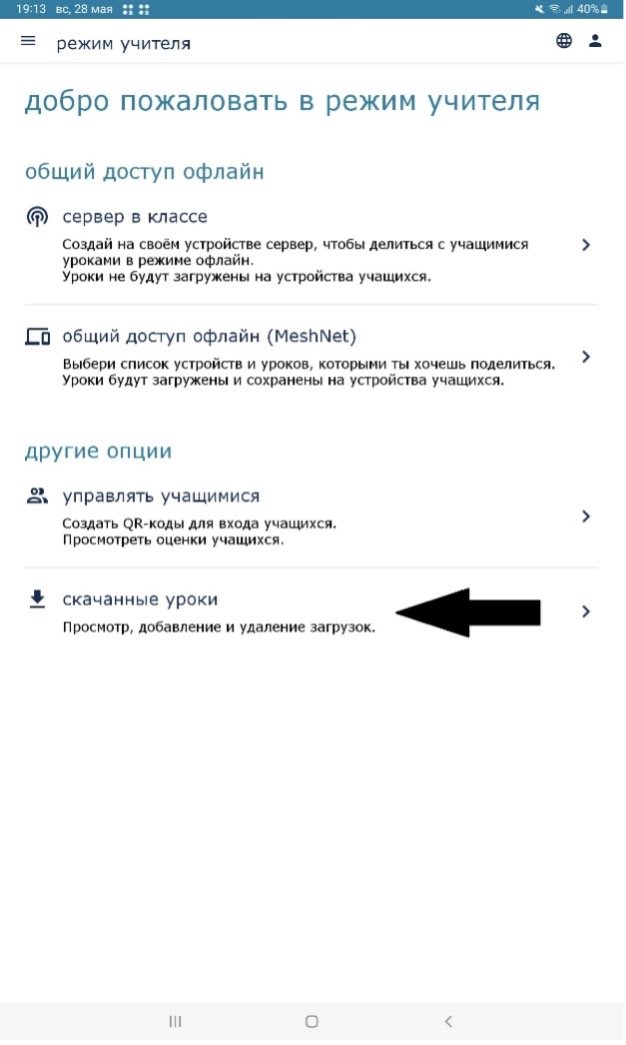
You need to go to "Downloads" in the additional menu in teacher mode or student mode and check if the data is loaded.
Or you need to select "downloaded lessons".
Next, check the download data. Sometimes the data are corrected, in this case you need to update the data.
To do this, you need to check the binding of the client tablet. To do this, go to "server management in the classroom"
Next, check if the server is in the list. This screenshot shows that there is a server called "Shkola 17".
There are times when the client cannot connect to the server and it starts to display an error. In this case, you will need to update the Akelius Languages app on Google Play and sign in with your Google account to update the app.
The saved scores are student grades. Offline mode is a tablet that is connected without internet access. It turns out that you save student scores on the tablet itself, without access to the Internet. In order to save students' offline scores, it is necessary to use MeshNet technology to synchronize grades (this function works with authorization using a QR code) between the client (students' tablets) and the server (teacher's tablet with an authorized teacher account).